Welcome to your Gizzmo onboarding journey! In this guide, we’ll walk you through two main steps: installing the Gizzmo Chrome extension and the Gizzmo WordPress plugin. Each step involves a series of simple actions to help you seamlessly set up and get started with Gizzmo. You can download the necessary files for the process Let’s dive in and start enhancing your content creation journey with Gizzmo!

Step A: Installing the Gizzmo Chrome Extension
1. Open your Chrome browser and navigate to the extensions page by entering the following link in the address bar: chrome://extensions/
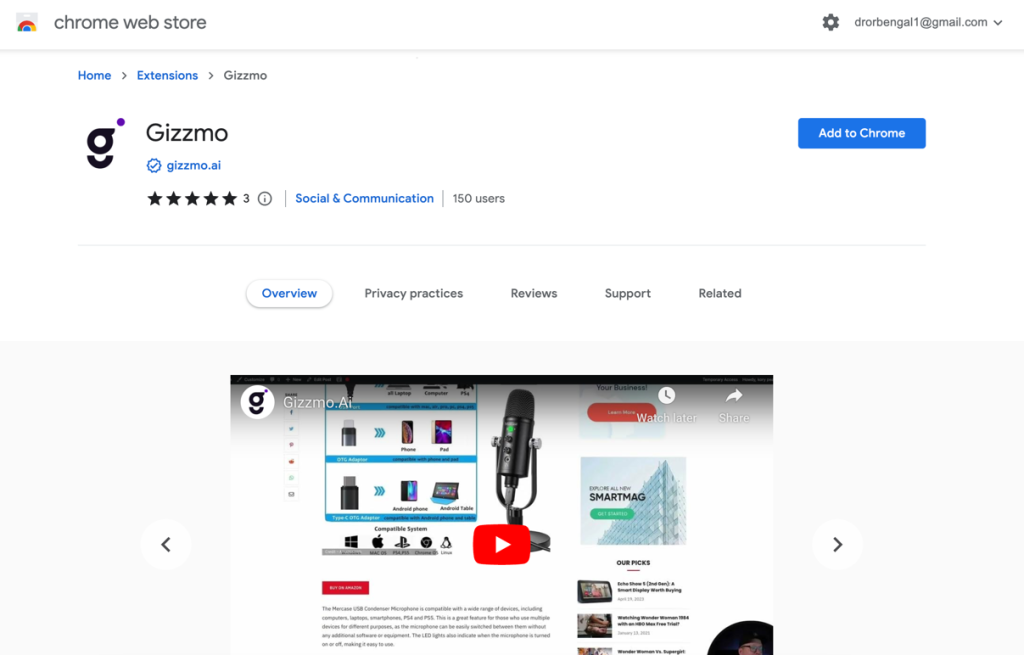
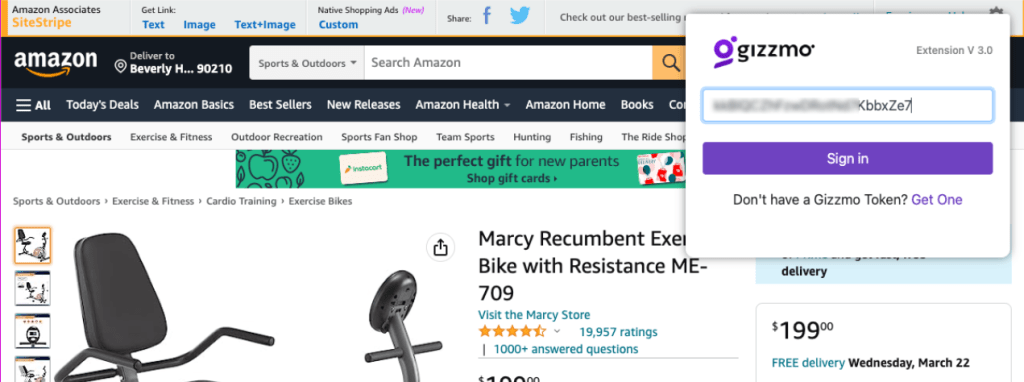
4. Visit Amazon’s website and navigate to any product page.

5. Enter your Gizzmo token and click on “Sign in”.
Great job! You’ve successfully installed the Gizzmo Chrome extension. Now, let’s move on to setting up the Gizzmo WordPress plugin.

Step B: Installing the Gizzmo WordPress Plugin
1. Log in to your WordPress dashboard and go to the “Plugins” section.
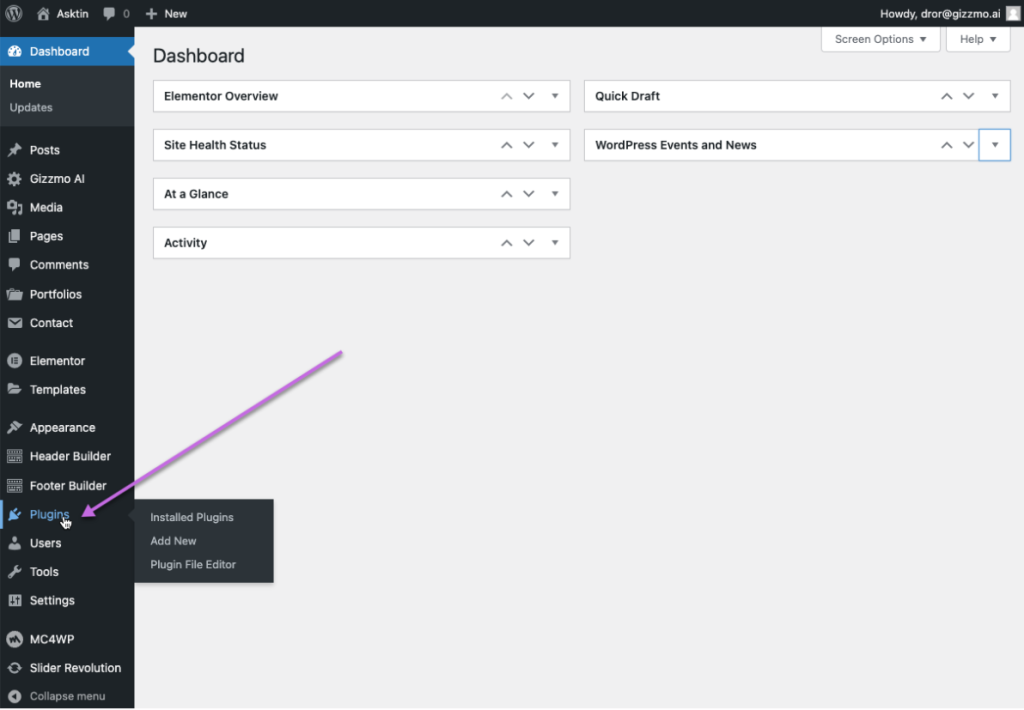
2. At the top of the page, click on the “Add New” button.

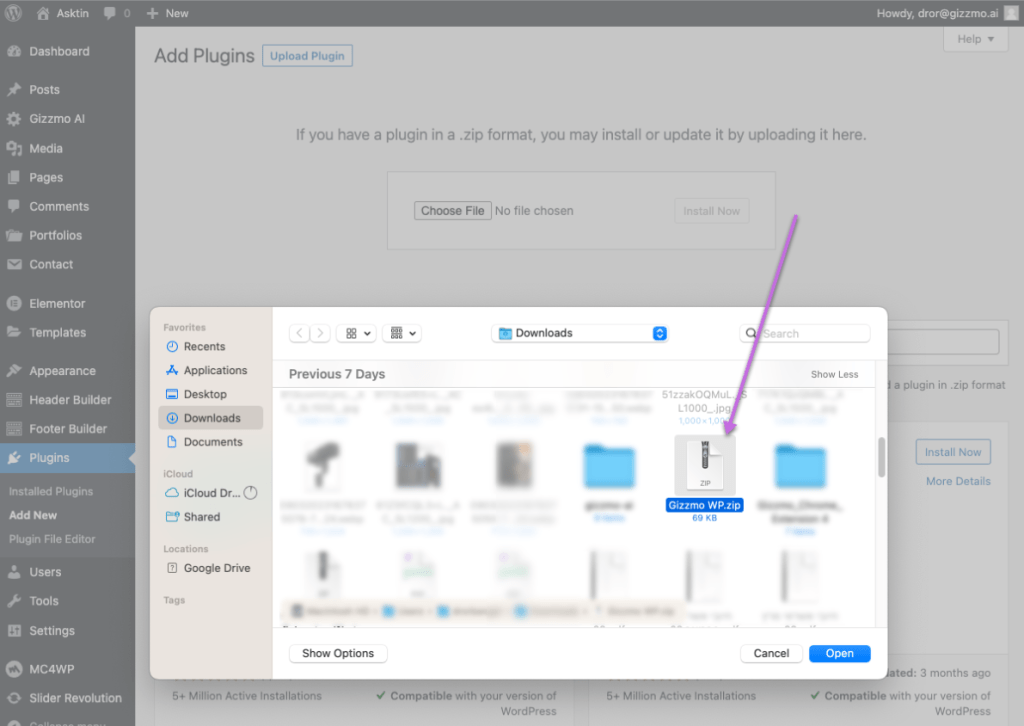
3. Next, click on the “Upload Plugin” button, followed by the “Choose File” button.
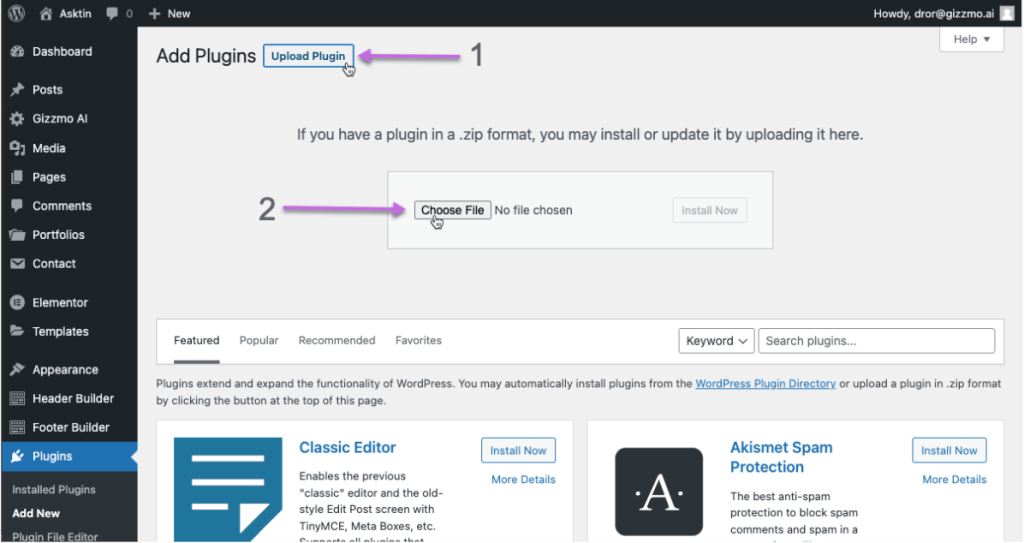
4. Select the “Gizzmo WP” zip file provided and click on “Install Now”
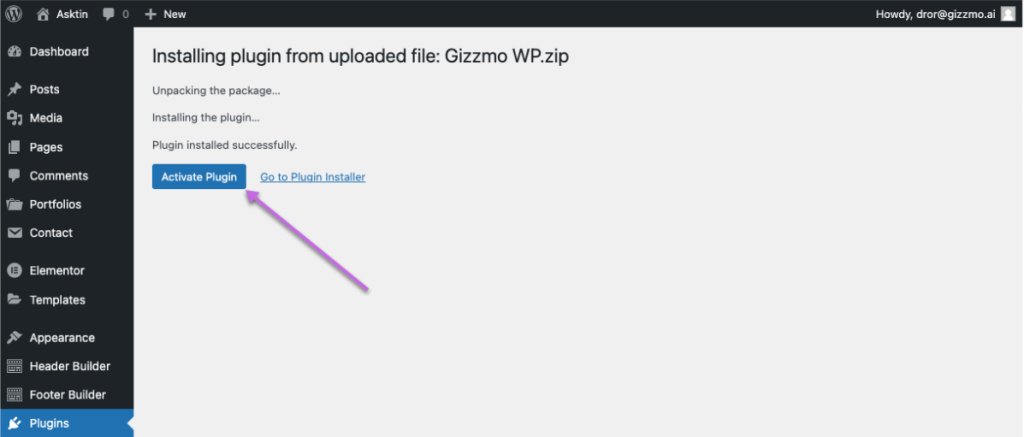
4. Once the plugin is installed, click on the “Activate Plugin” button.
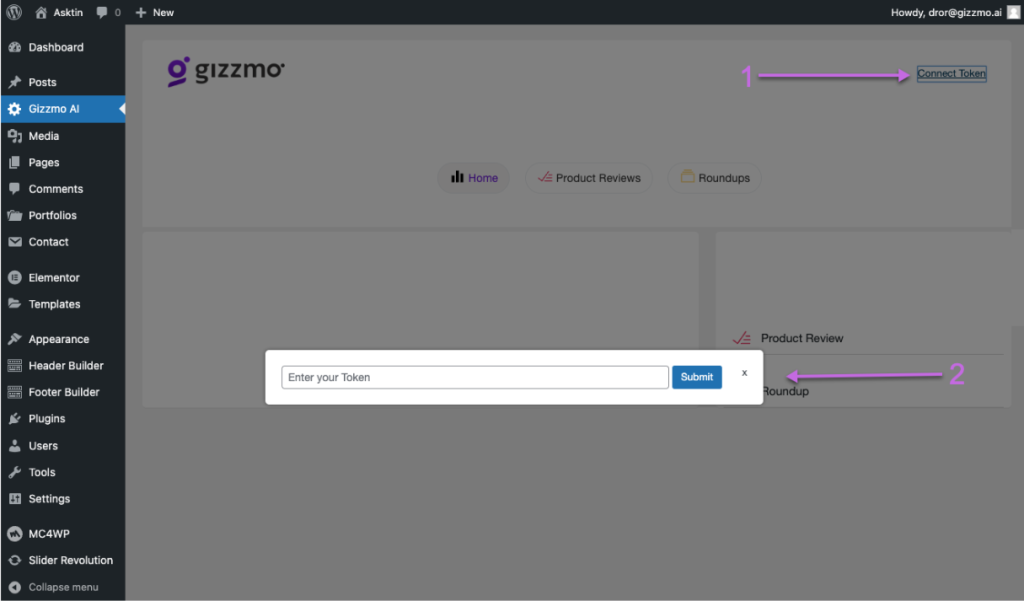
5. You will now see a new plugin icon in your admin menu. Click on “Gizzmo AI.”

6. On the right side of the page, click on “Connect Token,” add your Gizzmo token, and hit “Submit.”
Congratulations!
You’ve completed the Gizzmo installation process. You’re all set to start using Gizzmo to enhance your online experience. If you need any further assistance, please don’t hesitate to reach out to our support team. We’re always here to help!

